How to increase website traffic with an plugin WordPress
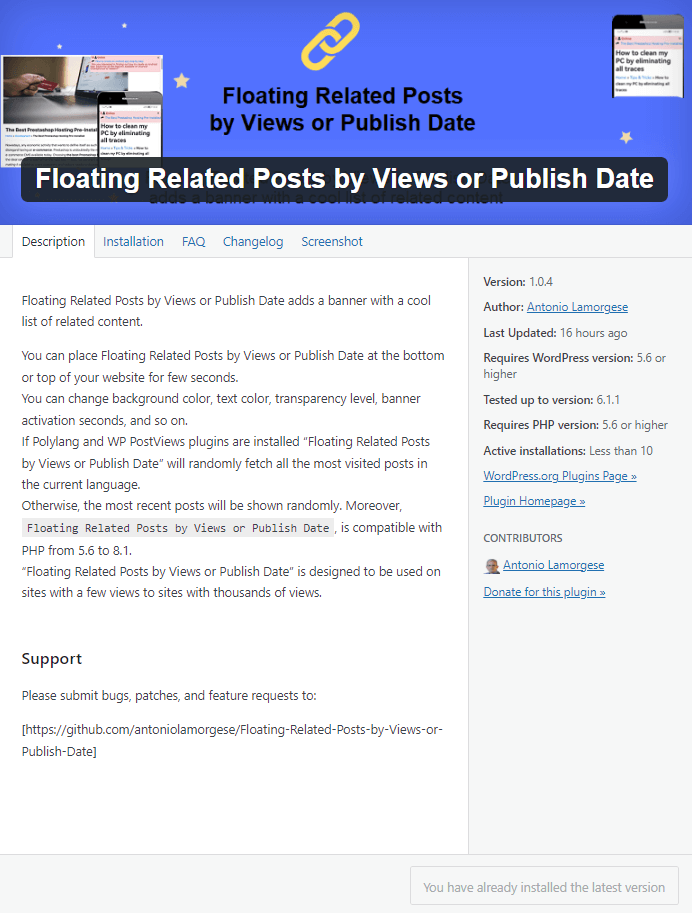
There are many ways to increase website traffic, but one of the simplest and most cost-free ways is to use a plugin like Floating Related Posts by Views or Publish Dates. This plugin will allow you to display, in a fixed and timed banner, a link to your blog posts, at the top or bottom of the web page, which will follow the visitor even when he scrolls through the article he is reading.
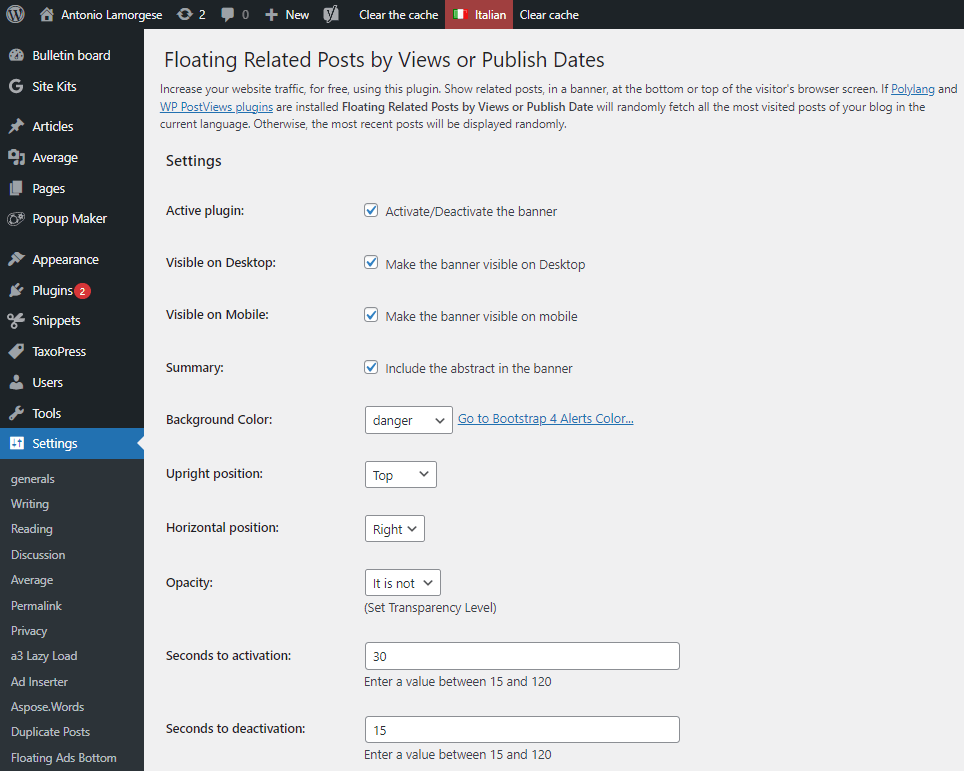
First, you need to install and activate the plugin on your website. Once this is done, it is possible to customize the display of the banner according to your needs, choosing the colour, the position, the activation times and much more. Furthermore, it is also possible to set a level of transparency for the banner, chosen from one of the three available.
One of the advantages of this plugin is that the banner containing the link and description to one of your most visited and randomly chosen articles will attract the attention of site visitors, increasing the chances that they will click on the link and visit, in addition to the page the page of the recommended post in the banner is also current. Further increasing the visibility and traffic to your website.
Bottom line, using a plugin like Floating Related Posts by Views or Publish Date can be an effective way to increase traffic to your website. It is simple to use and at no cost. Also, if you have plugins installed on your blog, Polylang and Wp PostViews, the articles proposed in the banner, will be displayed, randomly, based on the current language and the visits received. Now, I’ll show you how to install and customize the plugin Floating Related Posts by Views or Publish Date to attract as many visits as possible to your posts.

Table of contents...
Increase website traffic with “Floating Related Posts by Views or Publish Dates”
As I anticipated, increasing traffic to your website brings many benefits. Indeed it is the main objective of a blogger. So, it’s a given that you need to focus on that. Floating Related Posts by Views or Publish Date is the plugin you need to install to achieve this. Now, like any WordPress plugin, to install “Floating Related Posts by Views or Publish Date” all you have to do is:
a) Access the WordPress Dashboard
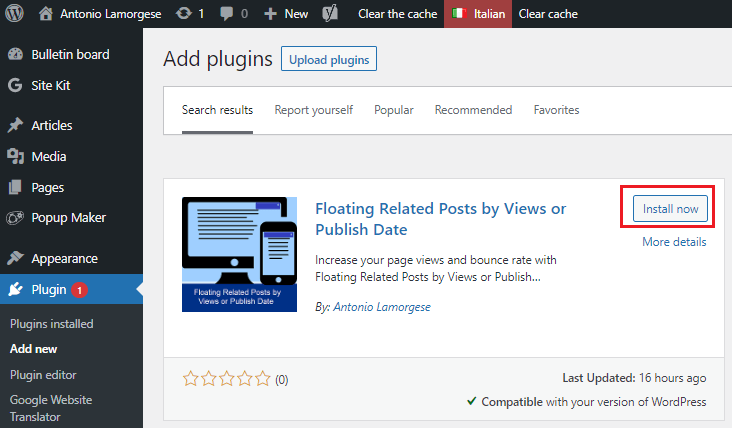
b) Go to ” Plugins ” -> “Add New”
c) Search for the desired plugin by typing in the search bar: Floating Related Posts by Views or Publish date.
d) Click on “Install Now”
e) Activate the plugin by clicking on the “Activate” button
f) Configure plugin settings. Operation by the way not mandatory.

Once the plugin is activated, the banner will be immediately available on your website. The customization of the options of this plugin is not a necessary operation as the default options will already be available.
Read more: “How to create a plugin WordPress”
How it works the “Floating Related Posts by Views or Publish Date” plugin
Immediately after activating the plugin “Floating Related Posts by Views or Publish Date”, the banner will be immediately viewable on your website. There is no need to give anything else. By default, the banner will be displayed every 30 seconds and will remain so for another 15 seconds. The banner color and activation times, including, background color, and transparency can be changed by accessing the plugin settings page.

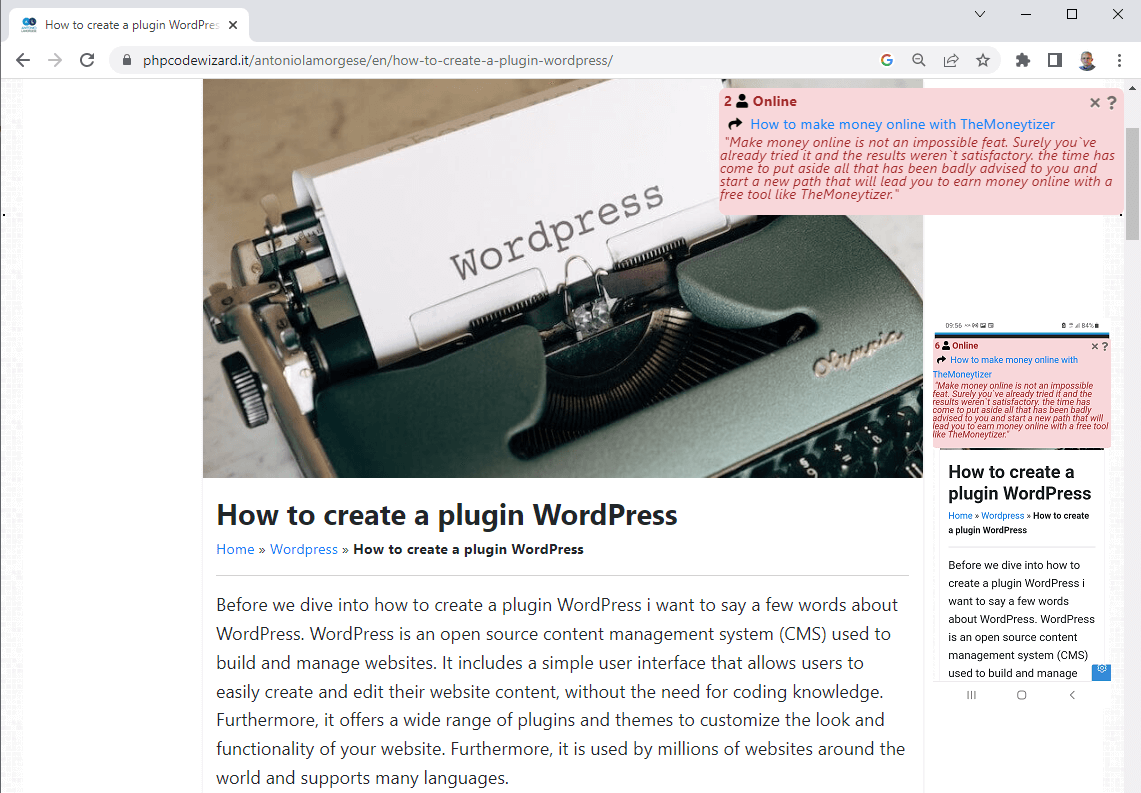
The banner with related articles in action
From now on, anyone who visits your articles will see a banner like this on both desktop and mobile devices:


