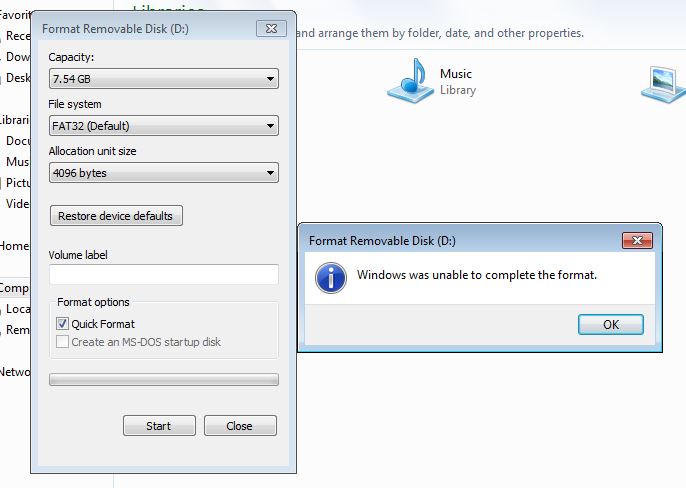
My USB flash drive, recently, started showing a strange reading error, trying to format it, Windows threw an exception during the formatting process. I immediately thought: my USB stick is lost. At that point I asked myself: How to repair corrupted USB drive? Well, after a lot of research I managed to find a reliable way to restore the USB stick to its initial factory condition.
Who knows how many times you have found yourself in a similar condition, and looking online you have tried any tool proposed by the experts, but believe me, I did it and no downloaded software was able to solve the problem.
1. What not to do if the unit does not work
In fact, when you find yourself in this condition, there is only one operation to do, leave the USB stick in the condition it is in, without launching any low-level formatting, partitioning and so on.
Running these software can irreparably damage the device and at that point, you will be forced to purchase another one, with the irreparable result of permanently losing your precious data.
So, when your USB stick is no longer readable or worse still no longer recognized by the operating system, raising the following error:

You have only one chance, continue reading this article and, in a few simple steps, not very common, you will discover an effective system that will restore your USB stick to its initial factory state.
2. Useful tips for your USB
As I told you, I tried different methods to restore a USB drive, I used the Windows DiskPart utility, Disk manager and third-party utilities from the command prompt, but I have never been able to restore an unreadable USB stick. Each time I thought that the unit was seriously damaged, consequently all I had to do was buy another one, irreparably losing all of its contents.
Unfortunately, even if you recover the USB stick, the data will be lost. This is the only flaw of the system, but at least you will recover the device.
Anyway, I give you some tips to avoid damaging your USB stick. First, when you keep it in your bag or on your desk, always make sure to cover it with the plastic cap provided to prevent the accumulation of dust and other contaminants on the contacts.
Never expose the unit to extreme temperatures, humidity or pressure. It may happen, for example, to leave the key in the car in the summer.
Never remove the drive from the USB port while it is still running. Use the “Eject” function correctly (right click on the USB drive and select “Eject”) before removing it from your computer.
Do not leave it connected to your computer for an extended period of time. If you are not using it, disconnect it from your computer. But now let’s see what are the steps to follow to reset the device.
3. Let’s start with the Restore procedure
Then, download the Chip Genius software from this link, extract the zip file and run the exe file. This software will allow you to trace all the technical data of the key, including its manufacturer and its serial number.
Take note of the chip vendor details as required to download the required tool. See figure below:

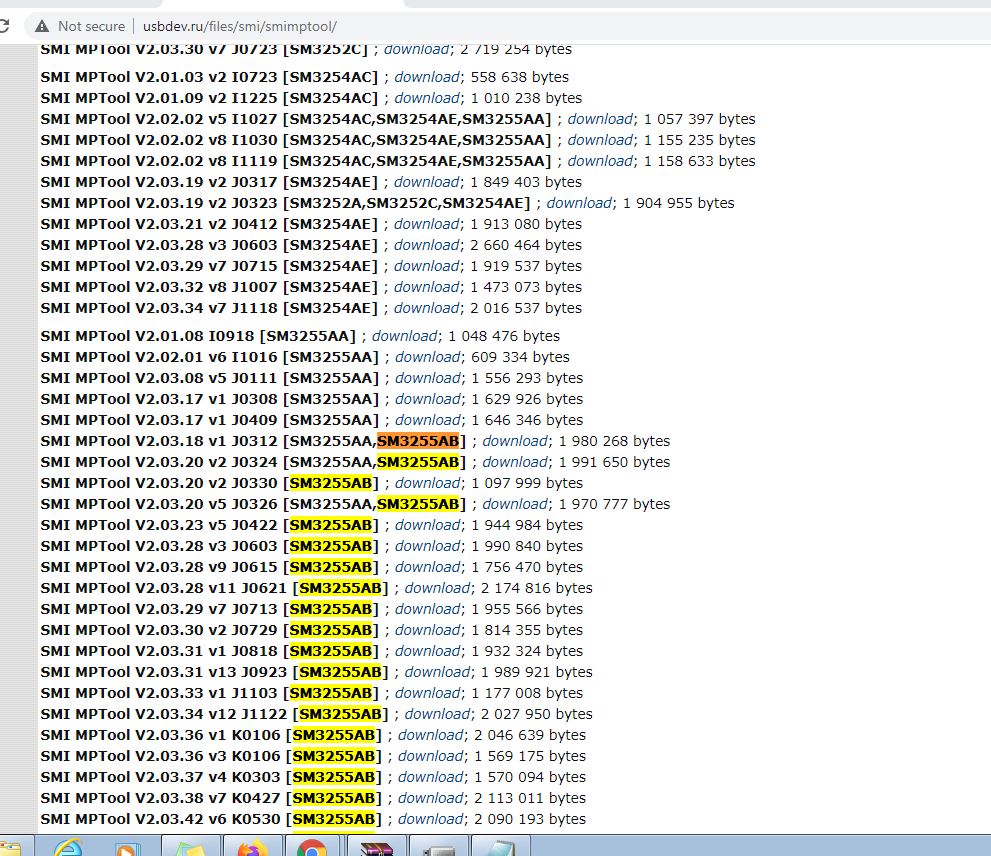
Open this website https://www.usbdev.ru/files/smi/smimptool/ find the chip supplier, in my case it is SMI Chip Vendor and the chip part number is SM3255AB, Download the latest software version , extract the tool as shown:

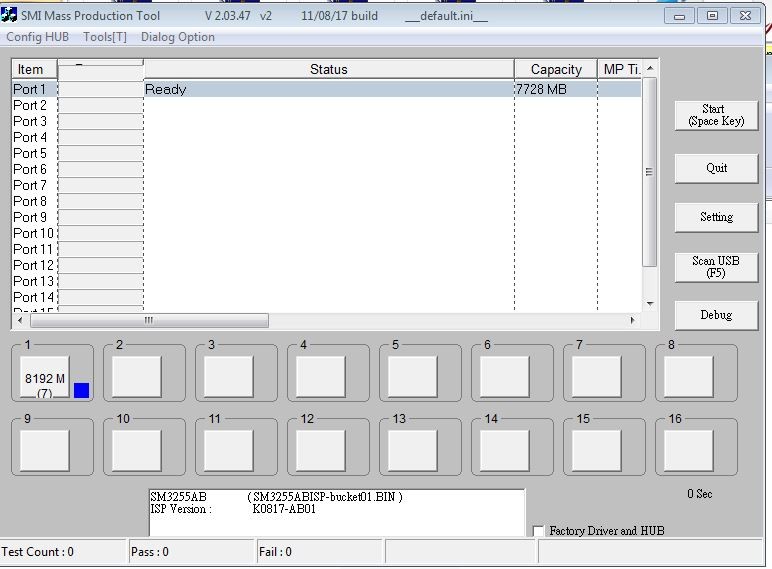
Remove the USB drive, before starting the software, plug it back in and the software should detect the device as shown in the figure.

Credit: https://www.rmprepusb.com
Click on “Start”, and the recovery tool will start repairing your USB key and returning it to its initial factory state.
Once the recovery phase is complete, you can now format the drive and start storing files and folders safely again. Your key is back in working order.
If you find it difficult to understand the steps described above, you can follow them step by step by watching this video.

![[100% Working] How to Repair Corrupted USB Drive/Pen drive-Transcend](https://i.ytimg.com/vi/PctjfnOXLkc/hqdefault.jpg)